10 Steps To Move Your WordPress Blog To Another Hosting Provider

Caution: Consider executing the steps below only if you are sufficiently technical.  The steps may be risky and can lead to loss of  your data so please don’t try them if you don’t understand them.

A WordPress blog consist of three main parts – the content, the WordPress software and the hosting provider on top of which it runs.  You are responsible for the content, the server capacity is rented out by the hosting provider and you install WordPress on the rented server. Recently I switched my shared hosting provider and the last thing I wanted to do was lose all the content and the settings on my blog.  Here are the 10 steps it took me to switch hosting providers with little or no downtime.

Step 1 – Understand the basics!

The first step is to understand what we are dealing with.  WordPress is a Content Management System.  This means the software will take your content and render it as per your liking.   The content portion of your blog  is stored separately in a MySQL database.   The rendering portion of the software is WordPress itself but may also consist of tweaks you may have made over time to the theme and settings.

So to backup from one hosting provider and restoring on another requires you to save the WordPress installation and also the underlying MySQL database.

Step 2 – Backup Your Site

You should always switch to a new hosting provider while access to the existing one is still valid.

Backup your site in as many ways as possible.  This creates redundant backups which are great to have if things go wrong.  The first manual step is use a good graphical FTP program, SFTP to your site and download everything you can. I mean everything in your home directory even if it sounds like a bad idea.

Now look for backup solutions your hosting provider may have.  A common one is creating backups using cpanel.  This lets you download a compressed backup file of your entire home directory.  Some hosting providers may remove this option or ask a separate fee for it so get in touch with your hosting provider but don’t tell them yet that you plan to move away.

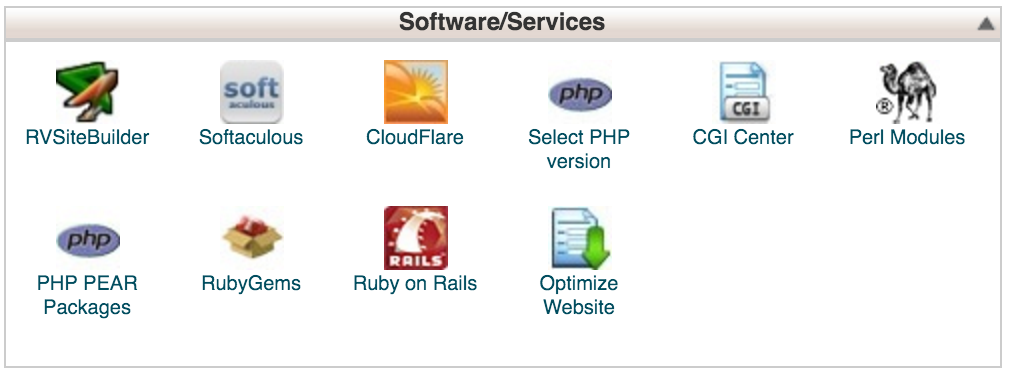
Another option is to use installation software such as Softaculous to create backups of your WordPress installation.  Steps are outlined here.  Make sure you backup both your installation and your database.
Screen Shot 2016-04-18 at 12.51.58 AM
Softaculous
Screen Shot 2016-04-18 at 12.53.05 AM
Option to backup from within Softaculous

The idea is to get as many copies of your data as possible.

Step 3 – Create a phpMyAdmin backup

The content of the blog is stored in the MySQL DB and you can use phpMyAdmin to create a backup of your database.  This may sound redundant but don’t skip it as it is an important step to  successfully import your data to your new hosting provider.    The steps are as follows –

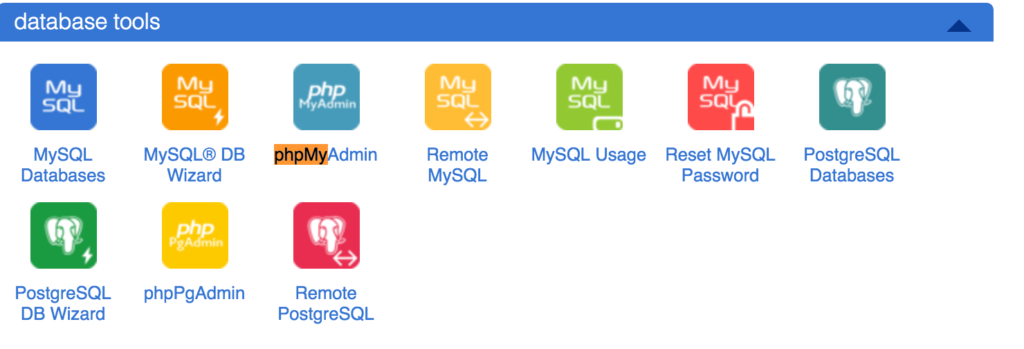
  1. Access cpanel (http://<yoursite>/cpanel) and click on phpMyAdmin.
    • Screen Shot 2016-04-18 at 12.53.54 AM
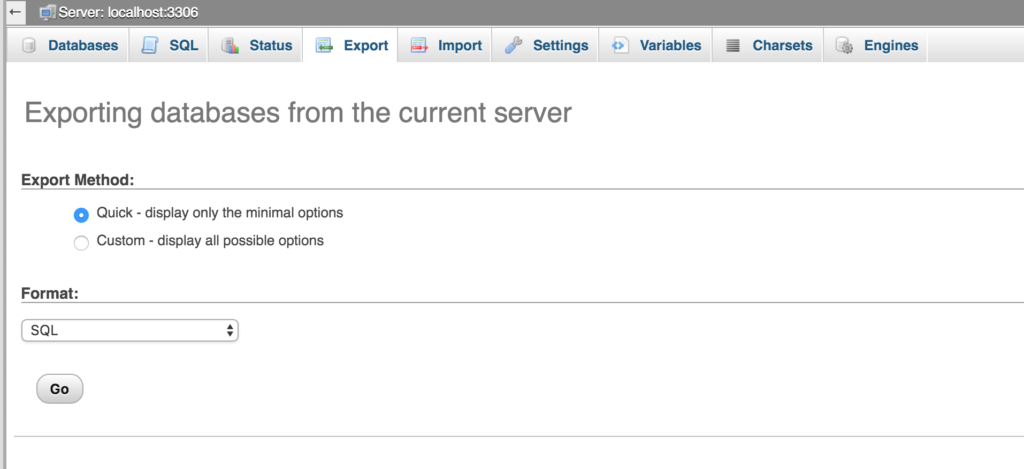
  2. Goto the export tab and export your database with the default options.
    • Screen Shot 2016-04-18 at 12.54.42 AM
  3. A text file will be downloaded on your machine.
  4. Open the backup file in a text editor and search to see if your blog content is in the backup file or not.  If the backup has your content, your database was successfully exported.
  5. Exit the editor and then create multiple copies of this file to create redundant backups.

Step 4 – Install WordPress on new hosting provider

Goto cpanel or whatever your hosting provider uses to install a fresh copy of WordPress.  We will be overwriting this copy with our backups later.

Note all the credentials you created during this step and store them in a secure location.

Step 5 – Restore the look and feel of WordPress.

  1. Goto your backups and locate your wp-contents folder.
  2. Connect to your hosting provider using SFTP and look for the wp-contents folder on the new hosting provider.
  3. Overwrite the wp-contents folder with the backup.  I prefer to rename the wp-contents folder to wp_contents.old and then upload from the backup.
  4. You may also have to edit the wp-content.php file. This file sits alongside the wp-contents folder and should only be hand edited and not overwritten from the backup.  I had to port the changes from my backup to the file on the hosting provider as I had changed the table_prefix in my previous installation.  To make the same MYSQL database work, the new installation also needed the same tweak.
  5. If you had a favicon.ico file (the small icon that browsers show in the tab for your site) you should upload that too.

Step 6 – Restore the MySQL database using phpMyAdmin

  1. Login to phpMyAdmin on your new hosting provider.  I use cpanel to launch phpMyAdmin and was aware of the user credentials required for the login.  This may require some help from the support chat of your hosting provider in case you run into login issues.
    • Screen Shot 2016-04-18 at 1.20.38 AM
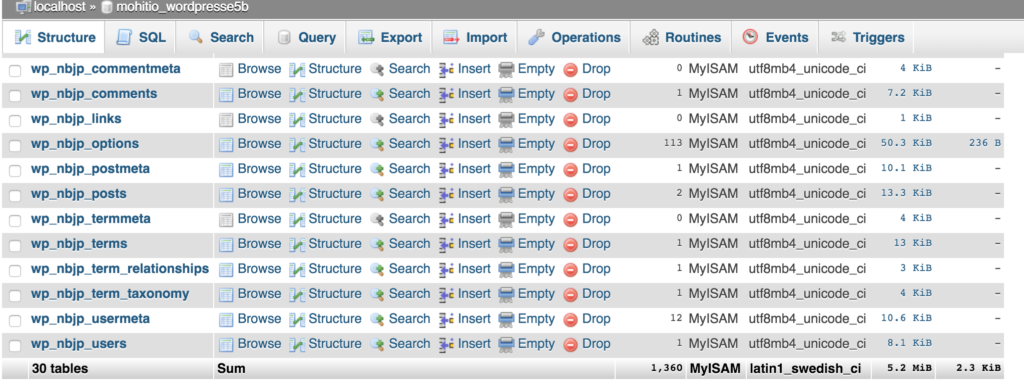
  2. In the databases tab, click on the WordPress database.  If you haven’t used your new hosting provider much, there should only be one database to choose from.
  3. The above link will open up the structure of the MySQL database you created when you installed WordPress.
    • Screen Shot 2016-04-18 at 1.28.51 AM
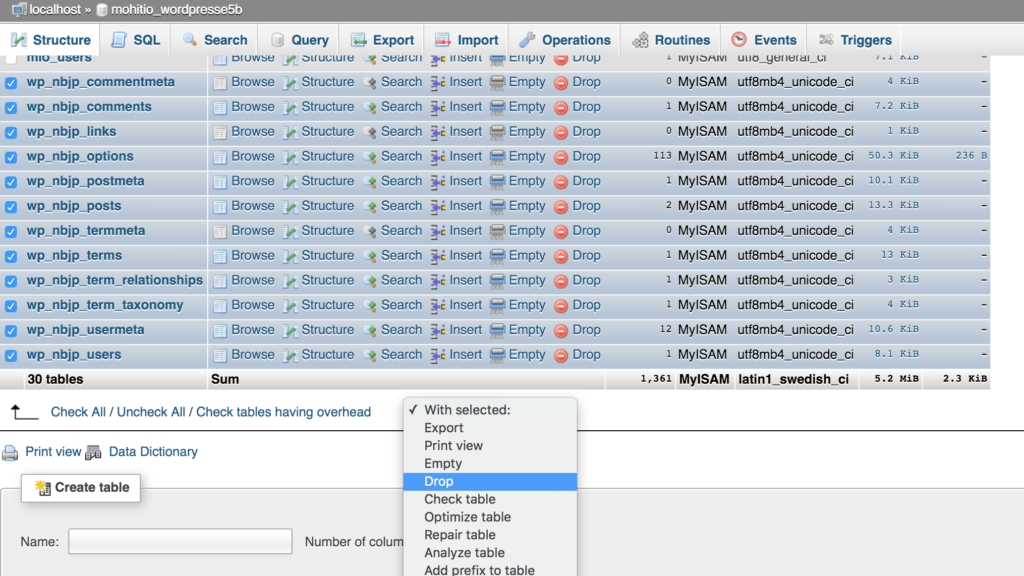
  4. This database has no data yet and we will drop all tables from it.  Select all rows and select Drop.  This will delete all tables from your database.
    • Screen Shot 2016-04-18 at 1.31.41 AM
  5. Now go to the Import tab and import the backup file on your local computer that you downloaded using phpMyAdmin earlier.

If everything goes well, you are almost done.

Step 7 – Update name servers

Name servers resolve your domain names to the IP address of the server provided by your hosting provider.  Your domain name settings should now be changed to point to the name servers of the new hosting provider.  This setting can be done through the interface you use for managing your domain name.

It make take a few hours for this to propagate.

Step 8 – Test your website

  1. Using the whois command make sure your domain now points to the new hosting provider.
  2. Goto <your_site>/cpanel and the cpanel of your new hosting provider should open up.  This means your domain is pointing to the new servers assuming your hosting provider does have cpanel support.
  3. Your site should work as earlier.  If you see a blank page you will need to find out what is going wrong.
    1. Right click in browser and view source.  If the source is blank, something may be wrong with your theme setup.
    2. Goto your_blog/wp-admin.  Sometimes the themes have errors in them but the admin page may work fine.
    3. Access logs on your remote server and try to make sense of what went wrong.
  4. Now check links in your blog to see nothing is broken.
  5. Tweak your blog settings till you fix the problems you encounter.
  6. Update any plugins or themes through your administrative interface.
  7. Activate plug-ins  you need in your new installation.  Don’t enable all plugins but only the ones you need.  It helps the responsiveness of your site and reduces security risk of your application in case a plugin becomes vulnerable in future.

This is the step where your hard work either pays off or you need to start again and give it a few more tries.  As each installation is a unique snowflake, it is difficult to list out detailed steps on what could have gone wrong.

Step 9 – Secure Your Site.

When you move WordPress, you may have forgotten the tweaks you did earlier to secure your site. For example, in my new installation, I forgot to disable directory listings and later had to add the following line in my ~/public_html/.htaccess file to fix this.

Options -Indexes

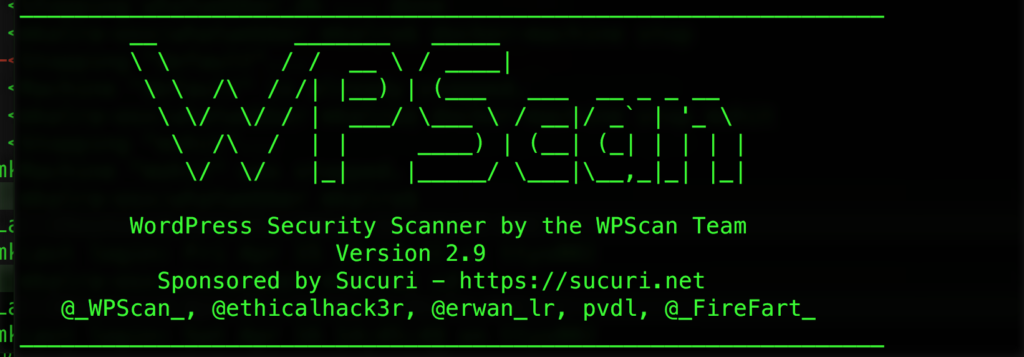
It is important to validate security of your WordPress site.  I use WPScan to test my installation and even though I thought I had installed everything correctly, WPScan identified a couple of misconfigurations I had missed.

Screen Shot 2016-04-18 at 2.11.14 AM

Screen Shot 2016-04-18 at 2.06.40 AM

Screen Shot 2016-04-18 at 2.05.36 AM

After fixing your issues, make sure your blog links continue to work.

Step 10 – Submit a cancellation request with your old hosting provider

After making sure everything works and data has been successfully migrated, submit a cancellation request with your old hosting provider.  Or else the hosting provider may auto-renew your membership and charge your credit card.

Conclusion

The above 10 steps worked for me to move to my new hosting provider after having been with the earlier one for 5 years.  I only need to track my cancellation request with the old hosting provider.

Keep backups, reserve sufficient time to switch between hosting providers and understand every step you take if you want to be successful with moving your blog.  As blog migration takes time and has some risks, first  think through the reasons why you want to move your blog to a new hosting provider before undertaking the project.

Web Hosting – Blogging 101 : Signing Up With A Web Host.

Choosing a web host is like buying any other product online.  One has a lot of choice and good competition owning to the declining hardware costs.

A web host is a server that will physically host your web site for everyone to access.  A web host is usually chosen on the basis of reliability (high uptime), good customer service, bandwidth + hardware provided and cost effectiveness.  Each web host will have something or the other to offer over others.  The best way to choose one is to read reviews online and see comparison tables on unbiased sites.  Everyone will have different priorities be it cost, bandwidth, space provided, etc.

webhost shopping

Below are the top lessons learnt while choosing a web host:

  1. Shared servers are cheaper than dedicated ones (duh!). The shared servers are the cheapest to host one’s website especially if it is your first.  Not a bad choice when you are just starting out and are yet to learn the tricks of the trade.
  2. Get discounts if possible. Be on the lookout for coupons / offers before placing your order.  Click here to read my blog entry that describes this.
  3. Browse a few of the sites hosted on the web host. This will give you an idea of the kind of response time the audience of your site can expect.  Check out http://www.myipneighbors.com/ to see the sites that hosted by your web host in addition to yours.
  4. There is nothing called free lunch. If some web host offers unlimited hard disk / bandwidth, just ignore the claims  as these sites are promising the world on the assumption that you never really need those many resources.  If you actually do, you will be restricted on the basis of CPU usage and the word “unlimited” will start making a lot less sense.
  5. Understand the services provided. For example, if you plan on writing a blog, check the version of PHP, MySQL and WordPress that the web host will provide.  If ssh is important for you, check to see if it included in the package or not.
  6. Choose a web host that provides a 30 day cancellation policy. Try to sign up with a host who has a cancellation policy and read it before you actually pay the money.  Get started with your site from day 1 so that you know whether the service provided by the host is acceptable or not.
  7. There is no free dinner either.  Make sure you are not taking the domain name (usually a promised lifetime freebie) from the web host.  If you cancel, you will usually have to pay for the domain name at a much higher rate.  Not taking the domain name from the web host gives you a lot of freedom to switch as per your will.  Remember the longer you commit yourself with the web host, the cheaper the cost will be.  However, you will be losing out on freedom to switch at will.

I think most of the time spent while finding the right web host goes into reading reviews, visiting forums and getting feedback on the shortlisted web hosts.  Getting hold of coupons and filling in the sign up form on any web host should not take more than 20 minutes.  The research is always worth the effort but do remember that people still make mistakes and learn from them too.

BTW the image above is my failed attempt to depict 99.9% uptime, a case where only 20MB of the unlimited harddisk space is used by a website, freebies offered by web hosts and your attempts to shop and search for something that suits your needs.

Web Hosting – Blogging 101 : Who Said Registering Your Domain Name Was Easy?

The first step while setting up a site is getting a domain name.

I think that the primary reason for not starting your web site is trying to get that name right.  And finally when you have it all figured, you realize that the name is already taken 🙂  And it doesn’t stop there.  The next 20 names (good or bad) that you can think of will be taken as well.  And then rather than searching for the domain name related to the one you initially had in mind, you start playing around to see if everything under the sun is taken.

It comes as a rude shock to the uninitiated that selling and buying of domain names is a trade in itself and a profitable one too.

Choosing the domain name is not easy.  SEO (Search Engine Optimization) gurus have a lot to share on how to choose a domain name.

?What Name?

In addition to what the pundits had to say, I introduced a few rules for myself (not necessarily applicable to everyone) to help me come up with a name I’d like to keep.

  1. Don’t choose a name with hyphens or numbers.  I have a personal dislike for them as they are difficult to remember.
  2. Don’t try to insert a city’s name in the domain name just because you live there.  Do it only if your blog covers a specific region.  To connect to a geography neutral audience, it may not always make sense to include the city / country in your domain name.
  3. Two words in a domain name is more catchy than three (or four or five for that matter).  Also the name gets to be a bit shorter with two words.
  4. Don’t use words that others are bound to misspell or misinterpret.  mysiteforeveryone.com may be typed in as mysite4everyone.com and your potential readers may never visit your site.
  5. If you are not into domain name trading, don’t take time bound names. myeuro2008sitehere.com is not going to make much sense since Euro 2008 is now over.
  6. I for one am not very fond of remembering URLs.  Domain names should have an inherent bookmarking capability. The words contained in the URL should be memorable and a person typing them in Google should be able to reach the site with ease.  Remember the keywords techno+chakra for your future searches 😉 [update: the site technochakra.com is now mohit.io]
  7. Before making the payment for your domain name, break its name into words and put them up in Google’s search box.  If the search results bring up embarrassing or negative stuff which you wouldn’t like to associate your site with, then you may want to give the name a pass.

However, at the end with all the rules and the free advice at your disposal, you will end up taking the name that is available :-).

A free time saving tip: Search for domain + names + ajax in Google and you will come across sites that will do search-as-you-type lookups for domain names. Given that a lot of domain names are already taken, such sites make it faster for you to search for that name you have been looking for.

Web Hosting – Blogging 101 : Top 5 Lessons Learnt.

Getting started with web hosting is not always easy.

If you are the kind who likes to do the research before taking the plunge, the amount of information on this topic can be very overwhelming. This is true especially if this is your first time trying to setup something on a web host.

Confused

There will be those who are just trying to setup that one blog that they have been planning to write ever since and then there are those looking forward to setup complete sites.

The top 5 lessons I learnt while digging for information on blogging / web hosting are :

You cannot learn all the steps before starting. Try to take one step at a time.  It does not matter if you do not know what you will be doing next.  If you are trying to register a domain name you should conveniently delay learning everything else about web hosting.  That way you will actually make progress.

Research takes time and even the best search engine (read as Google) can throw data at a rate you cannot possibly dream of understanding.  Don’t worry – eventually everything will start making sense.

There are good authors out there who write really good stuff. If you know how to use Google efficiently, you will manage to step over the various commercial sites who only want to sell you domain names, web space, dedicated servers and rank very high in the search results.  Learn the art of Google if you haven’t already.

The dilemma of choice. When you have decided to shell out money for a particular service provider, (say a web host), you are bound to come across a post that criticizes that very service.  If you take each experience very seriously, you will end up rejecting every provider out there.   The fact is that you will have to choose someone who does not have too many bad reviews or is not the one who was rated well in the past but has lost credibility over time.

There are discount coupons at every step of web hosting. Before paying money for a domain name or a web host, make sure you search for discounts available through coupons.  Just type the_name_of_site_you_are_going_to_pay + coupons in the search box and then let Google do its magic. Don’t be cheap but saving money is absolutely fine.  I would suggest you first decide a web host and then search for coupons than the other way around.